Guys, listen… just practicing different brushstrokes can totally transform your paintings. And this works for both acrylic and watercolor paintings!
In fact, there are tons of different brushstroke techniques you can try to add textures and blended effects to your art, and I’m going to share 10 of them with you right here, right now. Ready to get started?
Acrylic Brush Techniques
Now, with whatever medium of paint we choose to work with, it’s important to know the physical qualities of that paint so that we can let those qualities show on the canvas. For example, acrylic paints are typically very thick-bodied, so they can be layered pretty easy. They also dry quickly, which is a blessing in some cases, and, in others… eh, maybe not so much.
In any case, though, we need to work with acrylic paints, not against them, with our brushes. So, for example, it won’t help you any to try adding water to a dry acrylic painting to change it because dry acrylics are waterproof, unlike traditional watercolors!
Want to go even more in-depth with brush technique? Check out the Brushstroke Technique Class on Canvas Academy, a virtual class with a full hour video and a practice workbook included!
1. Free Brushing
The first of the brush techniques in our acrylic painting list is what many artists call “free brushing”—and it’s just what it sounds like.
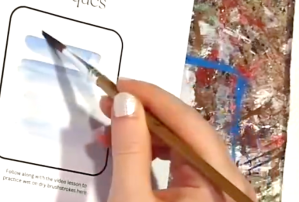
Free brushing involves making brushstrokes freely on the page, and there aren’t really any “rules” regarding how to make them. Practice them by making lines on a page with your brush, and play around with how hard or lightly you press your brush against the page.

2. Dabbling
Dabbling is a personal favorite brush technique of mine, and I’m sure it’ll be one of yours, too, once you try it.

To perform this technique, you will need to load up your brush with some paint, and then “dab” your brush against a page or painting surface. This will create some very nice textures, kind of with some small “peaks”.
3. Dry Brushing
Dry brushing is kind of an “advanced” painting technique, but that’s only because it takes some time to get used to it.
To perform this technique, you’ll need to press your brush against a page when there is very little paint on the end of it. It helps to do this right after you’ve tried another brush technique and before you clean your brush off in water. That’s why we call it “dry brushing”—it’s all about painting with a dry, but not clean, brush.

4. Doubling-Up
If you’re in the mood to mix two different paint colors together right on your canvas or page, try doubling things up!
The doubling-up paint method happens when you dip your paintbrush in two different colors of paint at once, then apply them simultaneously on your page. It kind of helps to swirl your brush around on the page to get the two paints to mix together, just at first, but then you can go on to create textures or fill in a space like you do with any other brush technique.

You can also try this method with three paints or more on your brush, too!
5. Gradient Blending
There are actually two ways to perform gradient blending, but I’ll just cover the simplest way here (check out my Brushstroke Technique Full Class to learn both methods!).

To try this method easily, apply two colors, one at a time, to an area of your page. Then, from there, blend them together in the middle, using whatever brushstrokes you’d like—whether it’s by swiping, swirling, or dabbing.
Watercolor Brush Techniques
Now, watercolors function a lot differently than acrylics do, so we need to use different brush techniques to get natural, easy watercolor effects. Specifically, and not surprisingly, watercolors use a lot of water, so it makes sense that we should implement water into our brush techniques!
1. The “Wet on Dry” Effect
The “wet on dry” brush technique for watercolors is essentially the same as the free brushing technique for acrylics. So, when you try this technique, all you need to do is apply a brush wetted with paint to the page, and then you may swipe it in any direction you’d like.
Note that it’s best to get your brush wet with water before dipping it in an also wet watercolor for the best effects. After all, watercolor looks best when it appears to saturate the page with color, and water is what makes this happen!
2. The “Wet on Wet” Effect
The “wet on wet” watercolor technique is a favorite of many, not only because it produces great results but because it’s just cool to watch, honestly.

To perform this method, you’ll need to take a clean brush, dip it in water, and apply the water to an area of canvas just like paint. From there, dip your wet brush in wet watercolor, and then just dip the tip of the brush in the wet area on your canvas. You’ll notice the water soak up the pigments of the watercolor, and it’ll disperse with some really interesting effects.
3. Flat Washing
Flat washing involves applying a pigment of watercolor to a wide area of a page or canvas.
To try this technique, all you need to do is soak a brush with a watercolor, then swipe that color in streaks across an area. Try to swipe the brush in long strokes, letting each swipe overlap with the last.

4. Gradient Washing
Gradient washing is a great method for getting a gradual transition from one tone of color to another. You can use this method to either graduate the color from one to another, like from red to violet, or from dark to light, like from light red to dark red.
To do this, you’ll want to flat wash an area of your page with one color, and then flat wash a couple more times along one of the edges of that area with either another color or with plain water. By adding more layers of flat water to the area, you’ll get some lighter versions of your original color, creating a gradient effect that extends outward.

5. Flat Blending
Flat blending is a way to get a new pigment of watercolor right on your page—that is, without needing to mix it before applying it to the page.

To try this technique, you’ll need to start by flat washing an area with one color. Then, you’ll need to flat wash over that area again with a second color. This technique works because watercolors are very translucent, and the top layer of flat washing will be thin enough that some of the layer underneath can also be seen through.
Now, I highly encourage you to practice these brush techniques before you create your next painting so that you can freely experiment with them. If you need more guidance or want even more tips on working with your paintbrushes, you can check out the full Brush Technique Class, too, available only on Canvas Academy!
Canvas Academy is an online learning platform for all levels of painters who are ready to take their skills to the next level. Whether it’s practicing your brushstrokes, creating a beautiful landscape, or trying your hand at watercolor flowers, this is your tool to becoming the best artist you can be.
You can take many classes on Canvas Academy, including some part of full-blown acrylic and watercolor painting courses. All classes and courses include full-length video classes and downloadable/printable painting files!


Now, I want to wish you all happy painting!
–Kari


Pingback: Take This Free “Color Theory & Painting” Workshop Online Now – Kari Lynn M.
Pingback: Learn Online with This Free Paint Blending Workshop for Beginners – Kari Lynn M.
Pingback: What Is “Value” in Painting & Why Does it Matter? – Kari Lynn M.
Pingback: Free “7 Elements of Art” Workshop | Online Class for Painters with Video & Workbook – Kari Lynn M.