Ready to take your acrylic flowers to the next level?
Because, whether you’re a beginner painter still having trouble with making any flowers on your canvases or you’re an experienced artist wanting to make your flowers more photo-realistic… well, I’ve got tips for you!
After all, painting flowers is a key skill that we should constantly work on—and it doesn’t matter if you’re new to painting or not. There’s always something new to try, and you may be surprised how how easy it can be to make beautiful floral scenes with your own paints.

Note that we’ve also discussed how to make the perfect watercolor flowers on the blog before, and you’ll find some similarities between those and our acrylic-painted flower here. This is just because some painting techniques can be used with any medium of paint, although acrylic paint can do some things that watercolor cannot—so there are some different techniques we can use, too.
Understanding the Acrylic Paint Medium
Like watercolor paint, acrylic paint is versatile medium that holds some really vibrant colors. Unlike watercolors, though, acrylics are thick-bodied and quite opaque. This means that they can be layered easily, and we probably won’t see through the paints we apply to the page or canvas.
And, if you don’t completely understand what that means, let’s translate it like this: acrylic paints make it easy to cover-up “mistakes”. So, if you try a new technique with a flower you’re painting, and things don’t really turn out how you’d have hoped, not all is lost—you can redo parts of your flower as needed!
Another thing we can do easily with acrylic paints is create textures. Because, again, acrylics are thick paints, so they can hold their shape on the page or canvas, making it easy for us to manipulate them.
Techniques to Try with Acrylic-Painted Flowers
Want to know the main key to making your hand-painted flowers look more realistic? Yes? No? Eh?
Well, here it is: practice, practice, practice.
Seriously, that’s it. And all great artists know it, too; if you’re not willing to practice your flowers over and over again, then you’re not giving yourself the chance to improve them.
So, here’s my top tip to you: practice each of the painting techniques outlined below, and don’t be afraid to try them more than once! Because practice really does make perfect, and just reading through this blog post isn’t going to be enough to make your paintings look beautiful; you have to put in the work and practice with your acrylic paints to level-up your acrylic flowers.
1. Reference a Real Photo
Anytime you want to make a painting look more realistic, you can benefit from looking at a reference photograph. Because, after all, photographs are real pictures of real life, really.
By glancing at a reference photo, you can see all of the different colors, highlights, and lowlights/shadows that a flower naturally takes on. Then, you can attempt to replicate all (or nearly all) of that in your painting.
For example, take a look at the photo of a tulip below. Try paying attention to all the details of it as you look, too, like the differences in colors, plus all of the shadows.
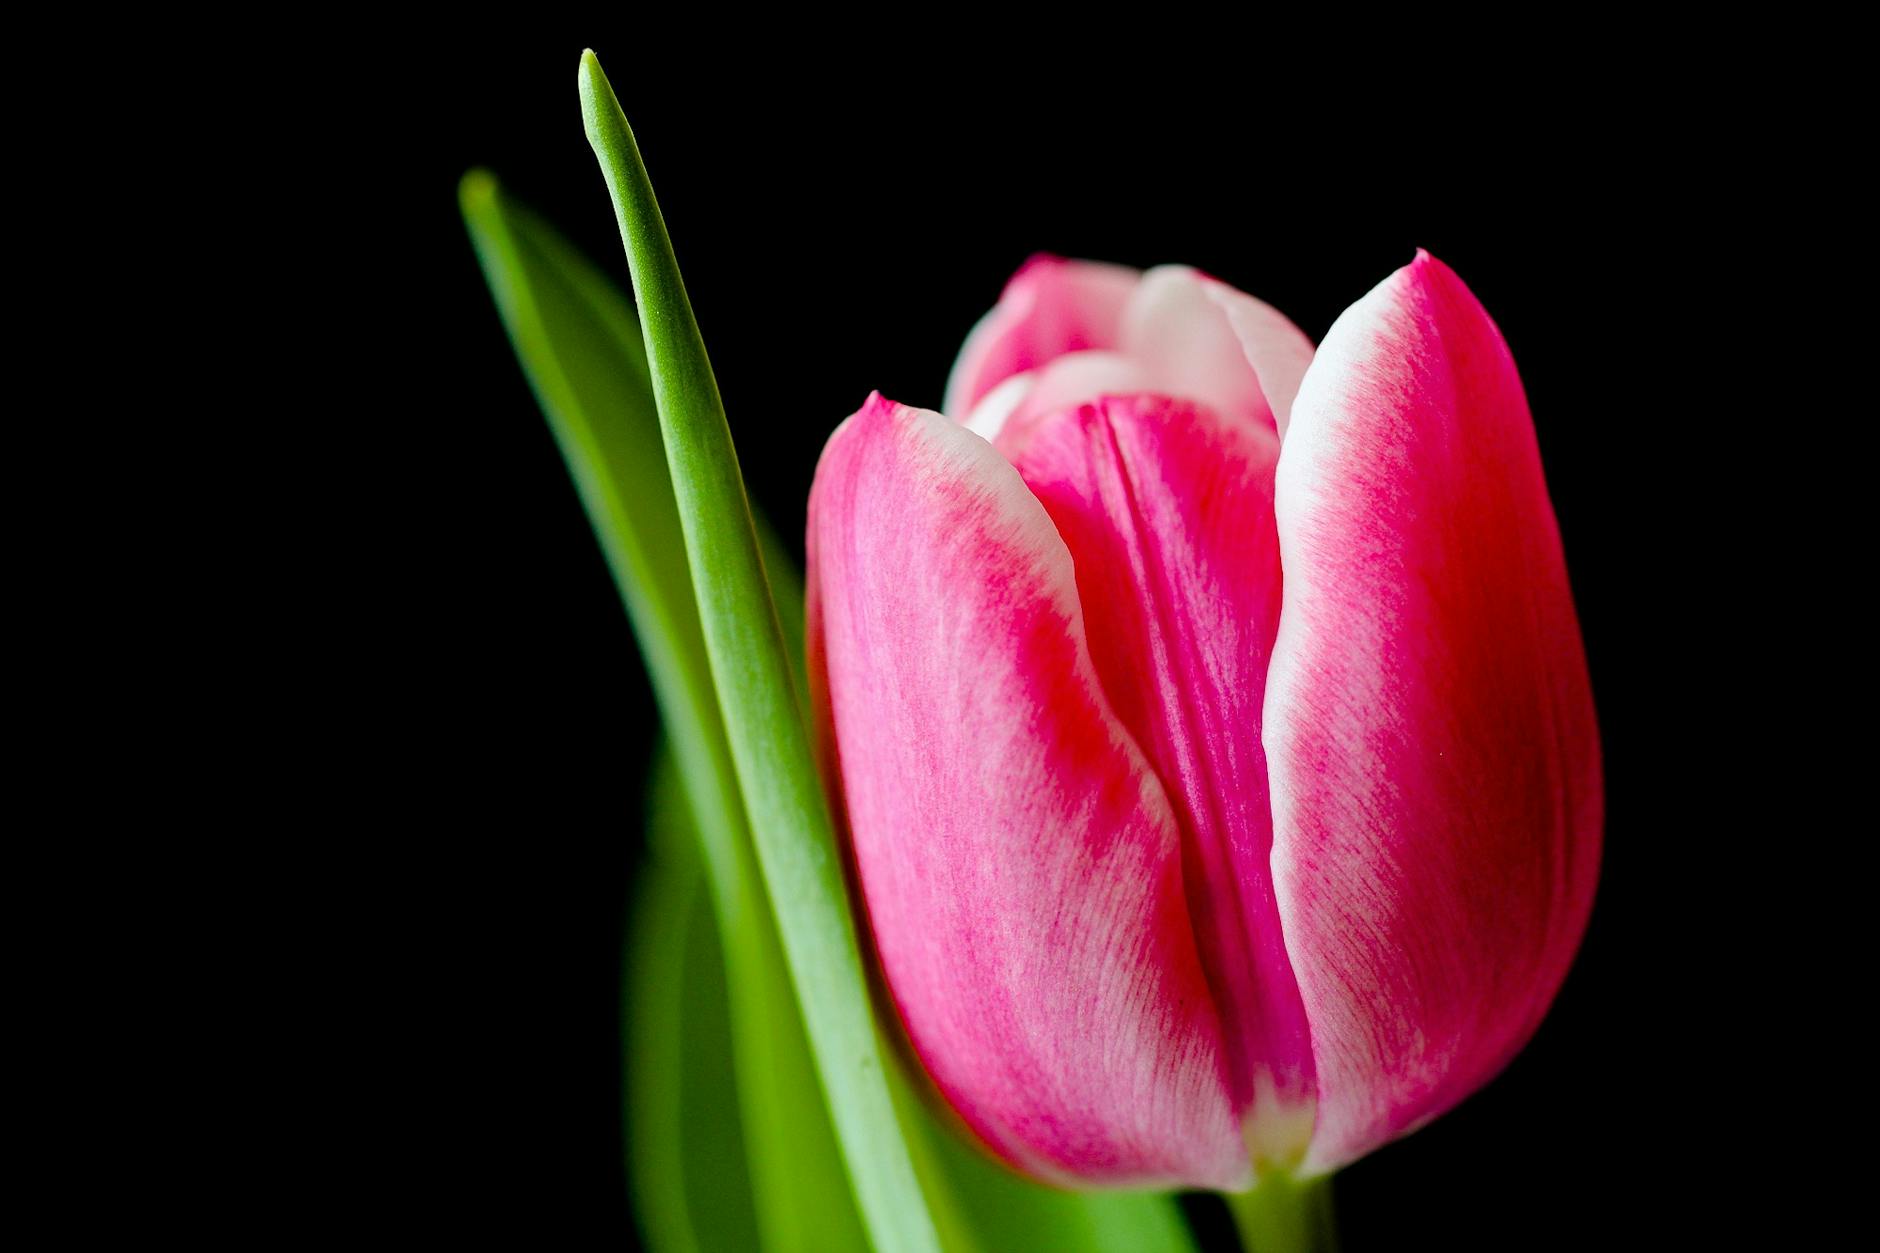
Notice those white highlights on the edges of the petals? How about the areas where the petals appear pink and the areas where they appear red?
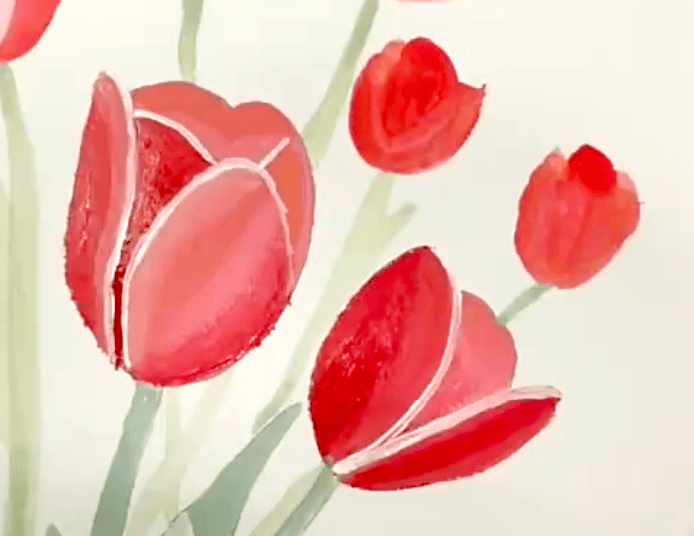
Noticing those details, even the most minor ones, can help you create a realistic-looking tulip with your paints. Take these acrylic tulips below as an example of this, in which we take some of those key elements in the photo into account!
2. Try it with Texture
Aside from adding various colors, highlights, and lowlights to a painting to make it more visually interesting, we can add different textures with our paints to add depth to the overall picture. And, as we already mentioned, acrylic paints are perfect for adding textures.
Texture can, of course, create a 3-dimensional effect to your paintings, which is something a photograph can’t do—so it’s up to you as to where and how to add textures (you can’t really rely on a reference photo to figure it out!).
There are a couple of different ways to add texture to an acrylic flower, but one of the most common is by using a dabbing technique. And this technique is just what it sounds like—it’s creating texture on the page by dabbing or dotting your brush against it.
This texture-building technique is great to try in the centers of your acrylic flowers, like in this sunflower below.

The goal of dabbing your brush as you paint is to create multiple tiny peaks of paint on the page or canvas. Once dry, these tiny peaks will physically pop up from the page, making that 3-D effect.
Another way you can add texture to a painted flower is by making “streaky” swipes of paint with your brush on the page. This can help add some dimension to flower petals, and, again, it results in a 3-D effect as the paint dries.
3. Take Advantage of Layering
Like we already mentioned, acrylic paints are really easy to layer atop one another, and there isn’t really a limit as to how many layers of paint you can add to an acrylic flower. And your layers don’t have to all be identical—you can add a layer of pink paint overtop a layer of red paint, or you can add a layer of texture overtop a layer that doesn’t have any added texture. The possibilities are endless when it comes to layers!
It should also be noted that acrylic paint is not very transparent, so you can always add a layer overtop any area where you might have made a mistake in your painting to cover it up.
Just take a look at the rose painting below to see layering in action. Note all of the red layers of paint that have been placed on top of the pink petals—and there’s a lot of ’em.

Now, it can be overwhelming to figure out where to start when it comes to making layers in your acrylic flowers—I totally get it. Which is why, again, looking back at a reference photo is the number one technique you should be using to aid you in painting your flowers. Painting based on a photo can help you find all of the subtle layers and details in every flower you want to take inspiration from—plus, there are tons of photos of flowers online to look at, so take advantage of that!
4. Break Your Flowers Down
Now, if I say that you really need to “break your flowers down” before you paint them, you might think that I mean you need to physically rip off and dismember the petals of a flower plucked from your backyard. And, you know, that might be a great technique for anger and/or stress management, but that’s not really necessary when we just want to paint flowers.
By “breaking down your flowers”, I really mean you should think of how to break your flower paintings up into a bunch of small, simple steps. Ideally, you should come up with all of these steps as you prepare to start painting, not after you’ve already started.
It’s completely up to you as to how you want to indicate what your steps will be. If you want, you can write down each of your planned steps in order on a separate piece of paper, or you can make a sketch separate from your painting and label it with your steps. If you’re an experienced painter, you may be able to get away with just making a plan in your head, but it really helps beginners to physically write down the steps of your paintings in some form.
And, while you can certainly break up your paintings in any order or way you’d like, I recommend doing things in some “organized” fashion; for example, try breaking up the pieces of a flower from the center-out. You can do this by tackling the very center of the flower first, then moving out to each of the petals, perhaps in a clockwise order, and then moving even farther out to the stem and leaves, if there are any.
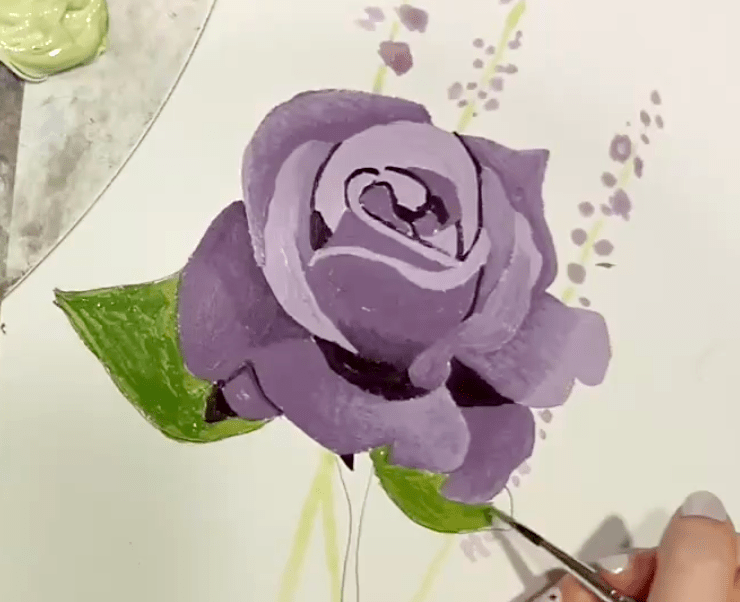
You can also break up a flower’s pieces from left to right or right to left, especially if there isn’t a defined center for the flower. Alternatively, you can tackle the steps of your flowers from the “outside-in”, as shown in the violet rose below, which is completed from the outside edges to the center in a counter-clockwise fashion, all before the leaves are finished.


All in all, the way you break up a painting of a flower doesn’t matter. What matters is that you do break it up, and you break it up in a way that makes sense to you.
5. Learn Even More with an Online Painting Class
Now, painting is a very visual art form, so it can be tricky to learn new painting techniques just from a blog post, like this one. However, don’t worry—there are online painting classes that will help you visualize everything in follow-along videos!
You can specifically learn more about painting flowers in both acrylic and watercolor paint mediums by joining the Flowers & Petals Painting Course by Canvas Academy.

This course is designed to help beginner-level artists, just like you, achieve realistic-looking flowers with nothing but a couple tubes of paint. Every class in the course features a full-length, in-depth video tutorial, plus there are downloadable sketch files available, so you won’t have to even draw a thing—just paint!
Just a few of the many flowers you’ll learn to paint in the course include:
All Canvas Academy members have full access to these and many more painting classes, including classes on how to paint fruits, landscapes, and even portraits. Join a community of artists just like you who want to learn and improve their painting skills with every brushstroke.
And, as mentioned in this blog post, practice is key to making your acrylic flowers the best they can be. So, pick up a brush, and try each of the painting techniques mentioned above.
Happy painting, fellow artist.
–Kari

