Ever felt like your paintings just aren’t “real” enough? Especially when you paint someone’s face, and particularly their eyes?
Listen, we all get frustrated with our own work as artists—it’s completely normal. But feeling that frustration is the first step toward improving—it’s what motivates us to seek advice and tips to make changes in how we paint.
Painting eyes is, probably, one of the hardest things to do as a painter. It’s true—eyes are very detailed, complicated, and noticeable parts of the face. Eyes are also what we, just as humans, tend to look at first when we see another person’s face; it’s like that old saying, “eyes are the windows to the soul…”
But this is why we tend to notice when the eyes we paint don’t look as realistic or professional as we want them too. It’s all because eyes are so important to us as human beings!
Now, I know what you’re probably thinking… “Yes, I’m very aware the eyes I paint don’t look good. But how the heck do I fix it?”
Don’t worry, fellow artist, I got you. Let’s take a look at a couple of simple, yet super powerful, tips that will help you paint eyes even more realistically than ever.
1. Break Things Down into Steps
You might be someone who typically paints a whole picture at once without even thinking of taking things “one step at a time”. But trying to paint an eye “all at once” can really overwhelm you. So, instead, let’s see how we could simplify things by putting it all into steps.
Take a look at the pictures below, which have taken after each “step” in the process of painting an eye. Notice how, between each picture, only a select certain area of the eye has been painted at a time.
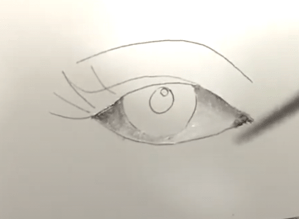


Of course, the order of steps you choose to take when painting an eye may differ from these, but this is just the process I (as a professional artist and online instructor) like to take.
Typically, I start with the eyeball itself, since this is the lightest area, and I want to tackle it when my brush and brush water are cleanest. I also find it less intimidating to start with a lighter area because it kind of helps us “ease” into painting the more complicated areas of the eye.
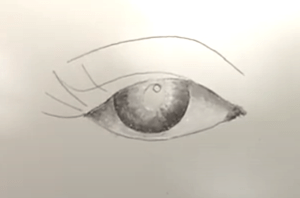
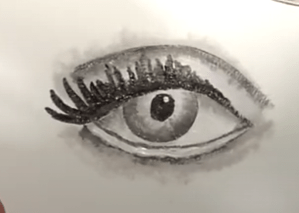
After that, I move on to the iris of the eye, AKA the “colored part”. From there, I will do the pupil, which is the darkest part, before I tackle the skin above and below the eye itself, including the eyelid. This makes it easier to add any eyelashes and outlining of the eye last (so that I don’t have to try painting the skin around the lashes later).
Play around with breaking things into steps like this, and you’ll find it more manageable to complete a whole eye. Otherwise, it can be tricky to figure out where to start and where to end.
2. Try Painting in Black & White
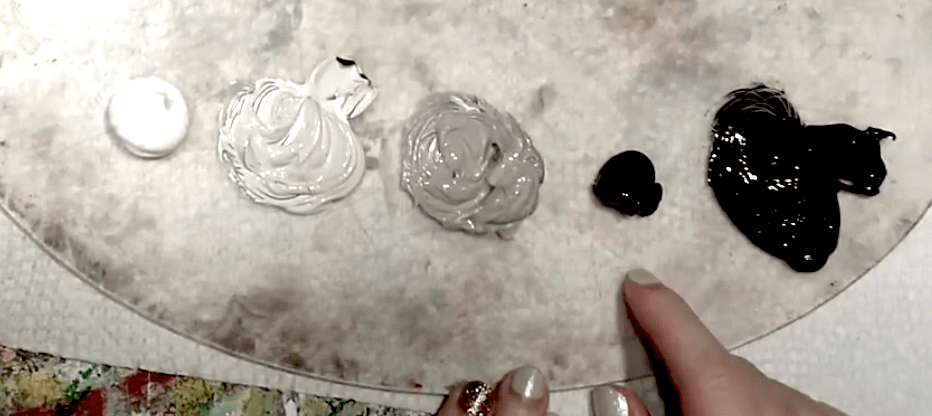
Something I always recommend beginner artists do is paint in grayscale, or “black and white”. This is because, with grayscale, you literally only have to worry about three colors: white, black, and gray. In the full spectrum of color, you’ll have to worry about, well, more colors—and that can make it harder to focus on just painting the details of an eye well.
To paint in grayscale, use regular white and mix a few shades of gray using either a tube of black or a tube of raw umber. Personally, I find raw umber much easier to work with because, when you try to lighten up black paint, you may sometimes get a blue tint to your grays. With raw umber, you will never get that blue tint.
3. Practice Making Thin Lines
Something that we so often overlook as artists is how we hold our brushes. And, when we paint eyes, there are always a lot of thin, detailed lines to make, which requires us to hold our brushes with a lot of firm control.
I know, it may sound crazy, but learning how to hold and control your paint brush can make a huge different when you want to paint realistically. To do this, experiment and practice, on a blank sheet of paper, making the thinnest lines of paint you possibly can. Play around with how you hold your brush, either from the top or more toward the bottom, and how tight of a grip you use.
Once you learn and master making thin lines, you can make more detailed lines in your painted eyes. For example, wrinkles and smile lines around the eyes are usually meant to be painted as thin as possible for a subtle effect in someone’s portrait.

4. Learn How to Best Accomplish Blending
Blending is everything when it comes to making a painting look realistic; this is because, in real life, shadows and highlights of light “blend” into one another on smooth surfaces, like on someone’s face. And, because eyeballs are round and have smooth surfaces, there’s not a place for stark contrasts between light and dark colors on them.
So, when you need to darken or lighten an area of an eye with your paint, add small amounts of paint to the area at a time. Then, with just tiny amounts of paint on your brush, you can better blend that paint onto the page or canvas. This is because small bits of paint are easier to control than large globs, especially when working in detailed areas, like an eye.

It also pays to practice blending paints together on a blank sheet of paper, just like practicing thin lines of paint (as mentioned in tip 3 above). There are different methods to blending paint together, but I always find it best to kind of swirl and/or dab your paintbrush to efficiently blend two paint hues together on a page.
5. Join Painting Classes for Beginners Online
Painting is a visual art form, so it helps to visually see how others make paintings when you want to improve your own work. Even better, learning from another artist with an online video class can make a huge impact in how you paint eyes.
You can get started learning how to paint eyes more realistically by joining a free painting class for beginners, just like this one.

This class is, in fact, taught by me—the same pro artist sharing all of these tips here with you today!
In this full, free class, we go step-by-step through painting an eye as realistically as possible. I take you through a process that’s much simpler than you think, and I help you practice your blending and “thin line” painting skills.
Now, if you want to practice painting eyes even more, I highly recommend you check out my full “How to Paint a Portrait for Beginners” painting course, online now!
This course not only includes 4 more total classes on painting eyes professionally, but it has additional classes on painting every other detail of the face, from the nose to the mouth to the hair and skin. Throughout the course, you’ll get to practice painting portraits like a pro, and you’ll even get to learn how to paint a few famous faces.
Join now and become the best portrait painter you can be!

Happy painting, fellow artist.
–Kari

