Have you ever had a special vision for what you want one of your paintings to be?
And you can see it so clearly in your head, and you know exactly how you want it to turn out… but then, once you get out a blank canvas, you freeze. Because how in the heck do you actually get your vision out on that white page?
Well, listen, my dear artist… you are not alone.
All of us painters get these moments. You know, the kinds of moments where you think you’re just never going to accomplish your goal—that end result painting you’ve conjured up in your head. But, honestly… no end result is ever too difficult to accomplish.
Video: How to Finish Your Paintings
Check out this full, in-depth video in which we chat, artist-to-artist, on how to actually finish any painting you think of. We go over a few examples, too, so you can see the best painting process in action.
You can also scroll down to read our 3 steps to success, too.
Step 1: “Map” Your Painting
The first step to bringing any painting into fruition is somehow planning how the painting will be laid out on the page or canvas. Most commonly, this is done with a pencil sketch. Sometimes, this can be done with “sketching” with your paints, too, but working with pencil is recommended for beginners as it’s easier to erase.
If you aren’t sure how to start making a sketch for a painting, take a closer look at what you’re trying to paint. Do you have a reference photo to look at, or can you look at a scene in real life (i.e. without a photo)? Then, using that scene for reference, try to pick out the most prominent lines you see and draw them on your page or canvas. Small or very detailed lines can be added in later when you’re actually painting, so just think of this sketch as your basic “blueprint”.
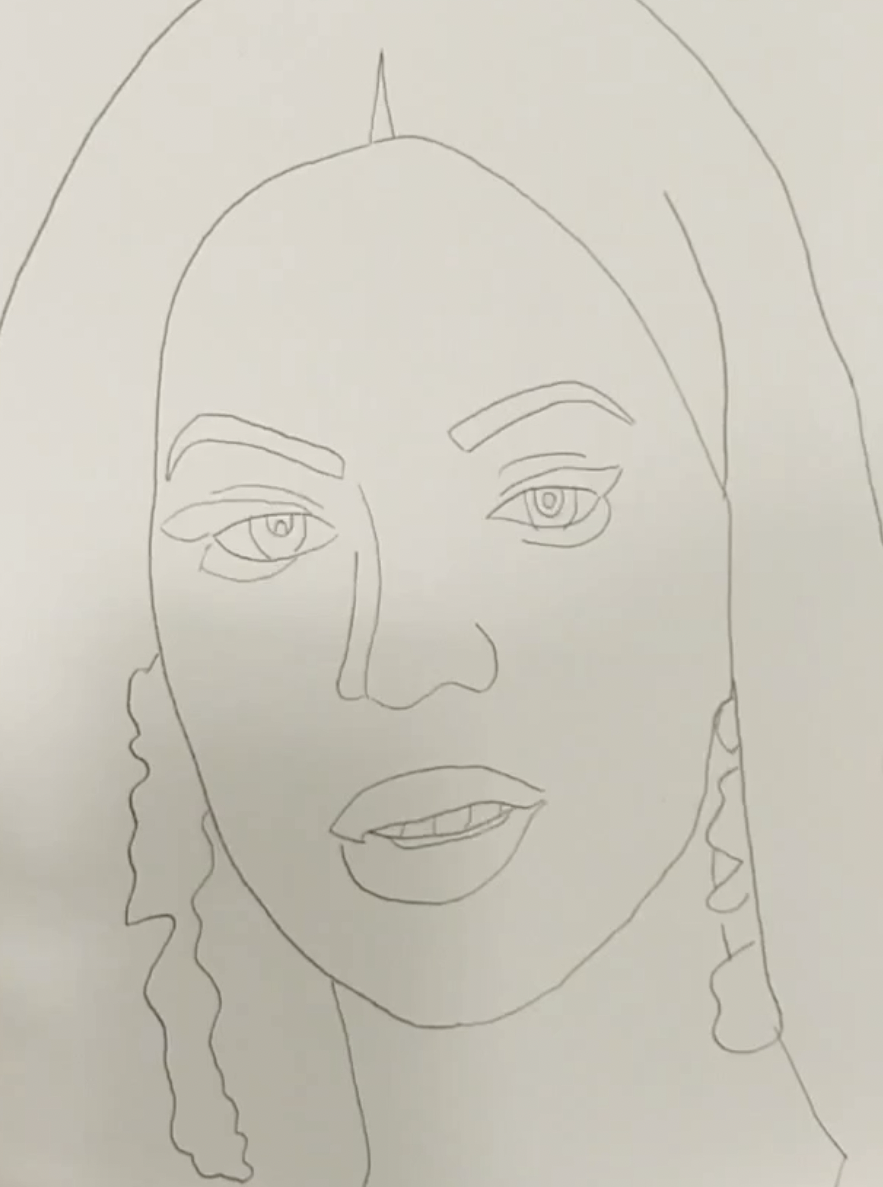
Sketching in and of itself is tricky, so it’s best to practice with simple paintings that don’t require a lot of sketching before moving on to more complicated things. Examples of simple paintings can include things like sunsets, beach or night sky landscapes, and watercolor flowers, just to name a few.
Step 2: “Chart” Your Colors
Before you start painting, you need to… well, make sure you have paints ready to use!
And, while you don’t have to make all the colors of paints you’ll use in a single painting all at once, it does help to get them all ready at once. That way, you’ll be able to go, go, go with your painting later, and you won’t have to stop to mix up more paint colors.
It doesn’t matter what type of paint you’re working with, too—you can mix up different colors of acrylics, watercolors, oils, and everything else in between on an artist palette. Using your palette, then, create a “chart” of all the major colors you see in that reference photo or scene you used to make your sketch. And, again, just the main colors are needed here (like the main lines in our sketches) because any minor differences in color can be made on your painting later.
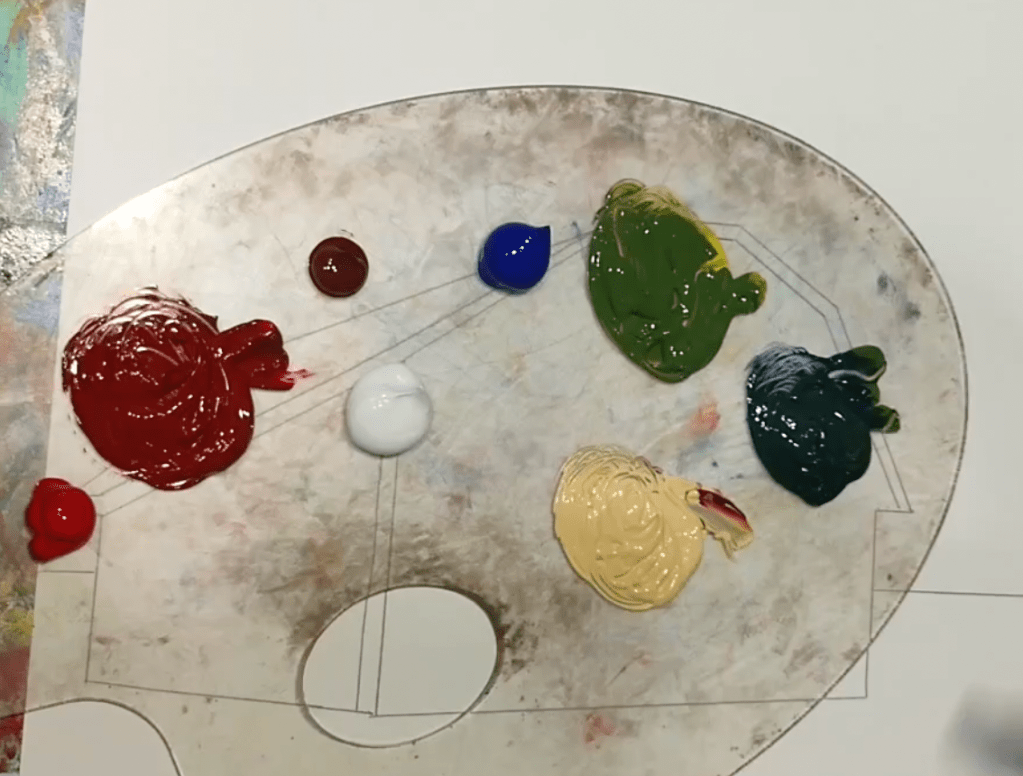
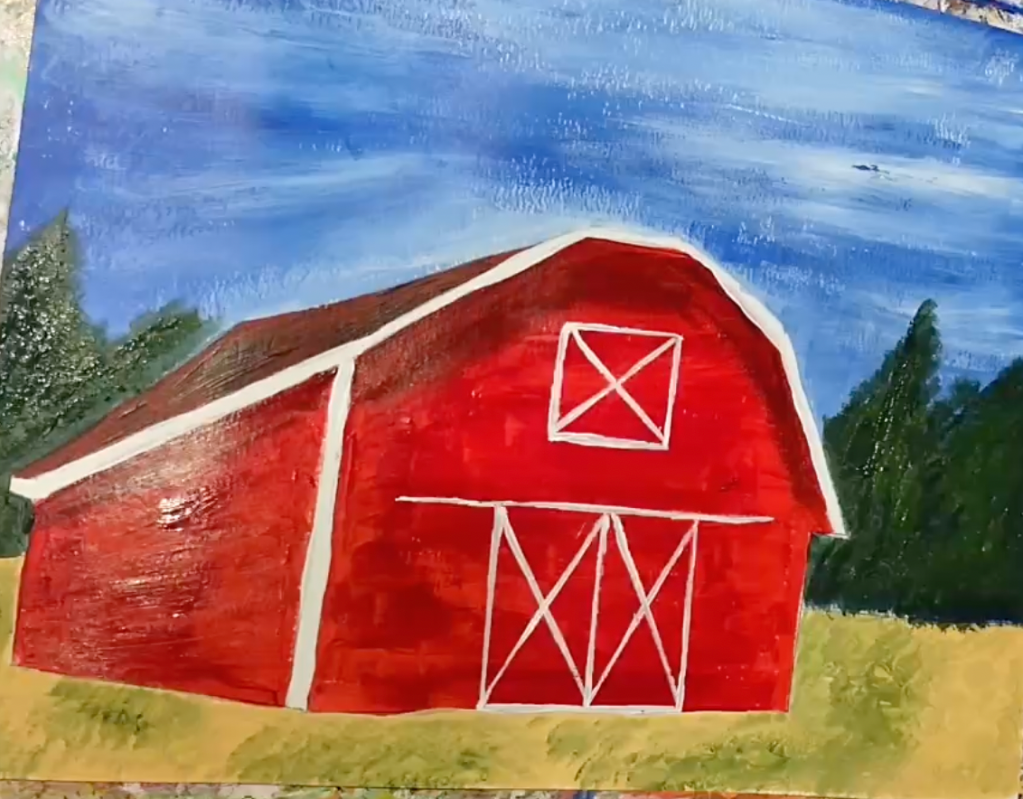
The palette “chart” of colors used to make this painted red barn scene. Notice how only the most prominent colors are on the palette—minor variations in color, like the yellow-green patches of grass were mixed directly on the canvas later on in the painting process.
Having knowledge of color theory is key here, because you may need to know how to make anything from pale orange to dark yellow or gold out of the paint tubes you have on-hand. And, when you don’t know what colors you may need in any given painting, it never hurts to make a color wheel on your palette, so then you’ve got almost all the colors available to use.
Step 3: Set a Painting “Game Plan”
Okay, so… you’ve got your sketch ready, and you’ve got your palette of colors all done. Now what?
It’s the fun part: painting!
Now, at this point, you’ve still got a mostly blank canvas or page in front of you. Even though you’ve prepped it with some drawing lines, it’s got a lot of white space to fill, and that can certainly be daunting. Don’t fret, though—we can break down the painting process into small, manageable steps (just like we broke down the “prep” steps into sketching and color mixing, right?).
While every painting is different and therefore is going to have a different painting process… there are some general ways to “break up” any painting into steps. For example, you could break things up into sections, or items, and…
- Paint items in order from left to right
- Paint items in order from right to left
- Paint items in order from top to bottom
- Paint items in order from bottom to top
- Paint items in order from most detailed to least detailed
- Paint items in order from least detailed to most detailed
- Paint items in a clockwise order
- Paint items in a counter-clockwise order
For example, if you were to paint a simple sunset over the ocean, you could break things up into “items” as the sky, the sun, and the ocean itself. From there, you could complete each item in any of the orders listed above.
The order of items you choose is totally up to you, and it’s a good idea to try different orders in each painting you do so that you find out what works well for your own process as an artist. Over time, you’ll probably figure out that some orders work well for a certain type of painting (like “top to bottom” in a sunset) and some orders work well for other paintings (like “most detailed to least detailed” in portraits).
The way you break a painting up into “items” doesn’t matter too much, either—in some cases, the way we break things up is kind of arbitrary. However, it’s so much easier to see a painting through to the end when you have a plan of how you’re going to paint it. So, making a plan of how you’re going to tackle the “items” in your paintings will help you tremendously.
Bonus Step: Practice!
All artists know that the best way to become an even better painter is by, well, practicing painting.
Only when you practice different types of paintings can you actually get a sense of how it feels to actually complete each type of painting—from landscapes to portraits and more. And, if you need to get more painting practice in, I can’t recommend my online painting platform, called Canvas Academy, enough.

Check out Canvas Academy for tons of premium and free painting classes, courses, and workshops. Every class is going to help you learn and practice new painting techniques with guided videos, downloadable/printable files, and access to one-on-one e-mail help.
And, hopefully, you’ll be able to take the knowledge you’ve learned here into your future paintings, either on your own in any classes you choose to take with other artists. Remember that you can always finish any painting you set out to do, just like any other goal you ever have in mind.
Have confidence in yourself, and happy painting.
–Kari