
Hey y’all! I’ve got another reading inspo-kind-of post for ya today… this time combining two amazing pastimes: reading and yoga!
NEW: Follow Along with a Guided Video
Because we all love reading, and we also love it when our bodies feel good. And yoga is a great way to get a good stretch in, even when you give it only 10 minutes or even less. Plus, regular stretching can improve your muscle strength and energy levels both in the short and long run!
So, I’ve been doing yoga daily for about… one or two years now (I don’t really remember), and it’s really become a source of comfort for me. Since I have it etched into my routine, I get to look forward to it every evening/night (I am not a morning person, so I don’t even try rolling out the mat until after dinner time), and I love using it as a break in between tasks and work projects. It always seems to get my mind off of the daily to-do lists (which are never ending, as we all know) and, literally, makes me stop and breathe for a bit.
And, since I’ve been practicing yoga for a while now, I’ve been able to rotate between different yoga routine/class types, and I’ve been able to figure out which type suits each mood I may find myself in. For example, when I’ve got a lot of energy to burn off, I opt for power yoga or lengthy vinyasa flows, while, when I’m either sick or just completely drained of energy levels, I opt for yin yoga or restorative yoga.
And, today, I’d like to show ya’ll some simple yoga poses that are more on the yin/restorative side, meaning they are easy to hold comfortably for a a few minutes at a time. A few minutes at a time that, might I add, could be filled with a great book on the side.
Now, without further ado, here are my top picks for easy yoga poses you can literally do whilst reading!
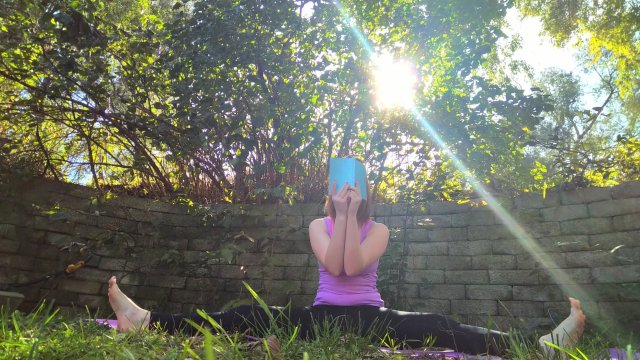
1. Cobbler’s Pose/Butterfly Pose
This is actually my all-time favorite yoga pose to do anywhere, any time. Well, you know, when appropriate… like, I’m still not going to sit down in the middle of Hobby Lobby and do it, you know.

To do cobbler’s/butterfly pose, sit on… well, your butt and place the soles of your feet flush together. Your knees can flap up and down in the pose, which I assume is why it’s sometimes called the butterfly stretch, and that’s an added bonus! Don’t worry if your knees don’t flap very low to the ground, though, because this pose stretches your inner thighs very slowly the longer you stay in the pose.
I also like to put my elbows on my knees in the pose, especially when reading, as that helps me hold my head up comfortably. However, if it stretches your legs too much to put your elbows right on your knees (because, hey, every body is different, and that’s totally cool!), then you can put a fluffy pillow or blanket in your lap to rest your elbows on instead, which I do, too, a lot when my muscles are too tight.
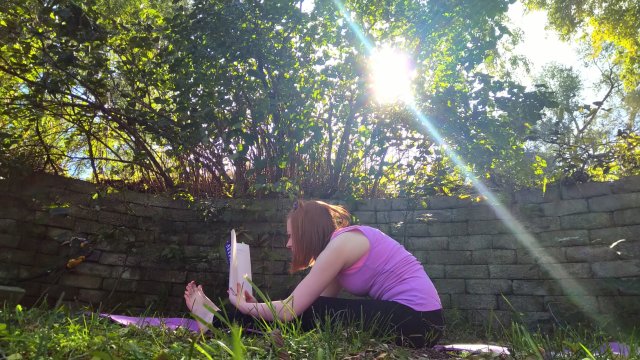
2. Seated Wide-Legged Forward Fold
This pose is actually the most difficult for me personally, and I honestly don’t know why… but, I will say that it has gotten a lot easier the more I practice it!
A seated wide-legged forward fold is really stretching all the muscles on the insides of your legs, so it may feel like there’s a lot going on down there when you sit into it. And, no, I don’t mean down there-down there…
To do this pose, sit with your legs spread, toes pointed upward. You can then fold your upper body forward until you feel a strong stretch, or, like me, you can totally stay up with your back straight while you read.
And, tip: I like to do this pose once with my toes points upward, towards the sky/ceiling, then another time with my toes pointed forward, toward the… air/wall. Flexing and pointing the feet gets you a slightly different stretch, though, so you can get it all worked out.
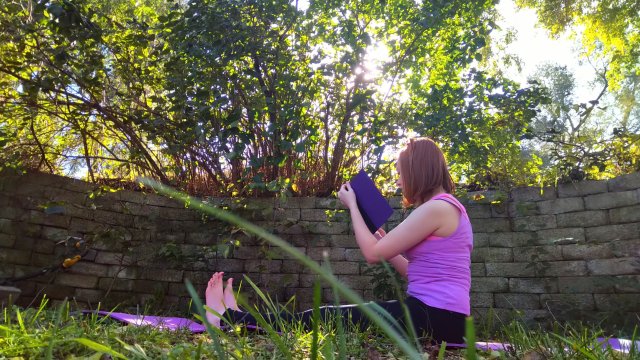
3. Seated (Regular) Forward Fold
I know, some yoga poses just do not have very creative names. At least, not in English, they don’t.
A regular, good ol’ seated forward fold is just like the seated wide-legged forward fold, only in this pose, your legs are stuck together, like a stick. And, again, you can fold forward as much as you’d like, or you can stay seated with your back straight while you indulge in your newest bought novel.
And, again, you can do the post with your feet flexed or pointed to target different muscle groups of your legs!
4. Staff Pose
This pose is actually the same as that version of the regular seated forward fold in which you sit with your back straightened. Although, traditionally, staff pose also requires you to keep your feet flexed and your back super-duper straight.
Again, like your regular seated forward fold, sit with your legs flush together, and flex your feet. Like really, really flex your feet—that way you feel a stretch in your calves. And, also, keep that back as straight as possible while you bury your face in your book.
5. Pigeon Pose
This is my second all-time favorite pose, and I actually learned it as something else (I can’t remember what) long before I got into yoga. It’s similar to cobbler’s pose in that it stretches your inner thighs, but it’s a little more intense because you extend one leg out while the other is bent.

All of the other poses I’ve shown you are ones that are evenly distributed through both legs, so you only have to do them once to get the full stretch. However, pigeon pose is one that needs to be done twice, once on each “side,” so that you get the full stretch in both legs. So, to do pigeon pose… well, the easiest way I can explain this is by saying this: pretend you’re going to do the side splits, but bent your front knee. You can then adjust your bent leg to get the stretch that feels right for you, as bending it more will de-intensify the stretch and bending it less (say, to a full 90-degree angle at the knee) will intensity the stretch.
While reading, you can either keep your back somewhat straight (it’s very difficult to have a completely straight back in pigeon pose, as it usually just ends up being a back-bend when you try), or you can fold your upper body over and rest your elbows on your bent leg or the ground. You can also use the help of a comfy pillow or folded up blanket here, too, to keep your elbows up high. Sometimes, pigeon pose makes my legs fall asleep when I stretch too far, so be sure not to stay in it too long if you’re uncomfortable!
6. Reclined Cobbler’s/Butterfly Pose
And… now we’re going to get into some “reclined” poses, which are basically some of the same things we already did sitting… except, now, we’re on our backs, and it can be a lot easier to hold for longer!
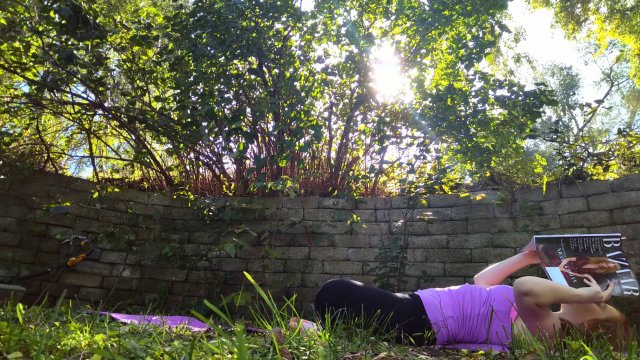
To do reclined butterfly/cobbler’s pose, lay on your back, and then put your knees together. You can then let your knees separate and fall down with gravity on their own, keeping the soles of your feet together all the while. Pay extra attention to the curvature of your back while doing this pose, though, as those with sensitive backs might find it more comfortable to put a small pillow or rolled up towel under the curve of the back.
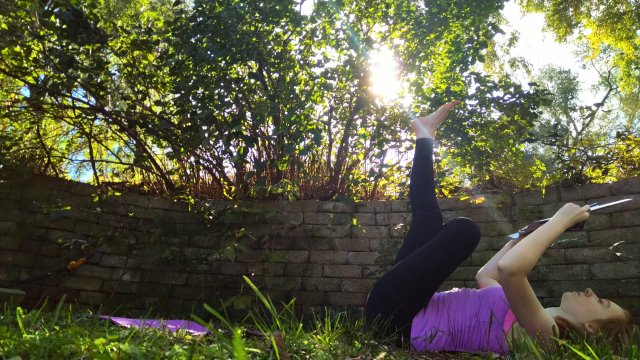
7. Reclined Pigeon Pose
Another one of my faves, of course, is the reclined pigeon pose. I think this is actually one of the easiest yoga poses to hold, too, and there are even two different ways to execute it, so you have options to change things up mid-page read.
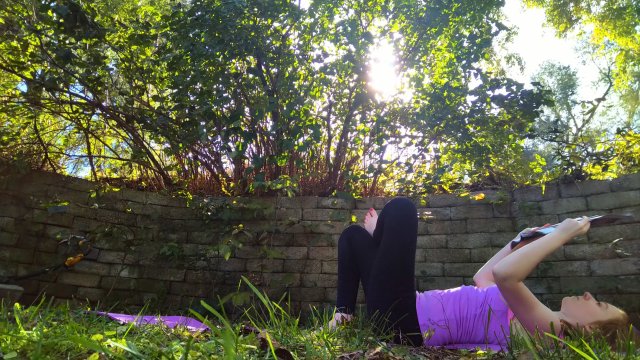
To do reclined pigeon pose, start on your back with your knees pulled up, feet on the ground. Then, bend one knee and place its ankle right against your other leg’s knee. You can then push and pull that foot that’s still on the ground closer to yourself and farther from yourself to see where the best stretch lies. (Hint: the closer your foot is to your butt, the more intense of a stretch you’re going to feel.)
You can also chose to extend your foot from the ground to the sky from here. This will also intensify the stretch, but it’s important to remember that your extended leg does not need to be straight. In fact, it should not be completely straight because, if you lock up at the knee, you could cut off your blood circulation in your leg, and that’s never a fun time, guys.
Tip: because I have a hard time sitting still, like, ever… I like to extend and bend my leg time and time again within the pose. Usually, I extend it until I start to feel my toes turn cool, and then I put it back down for a minute or two, then I repeat the cycle.
8. Standing Forward Fold
And now it’s time for some standing poses, just in case you’re ever tired of siting while you’re also reading!
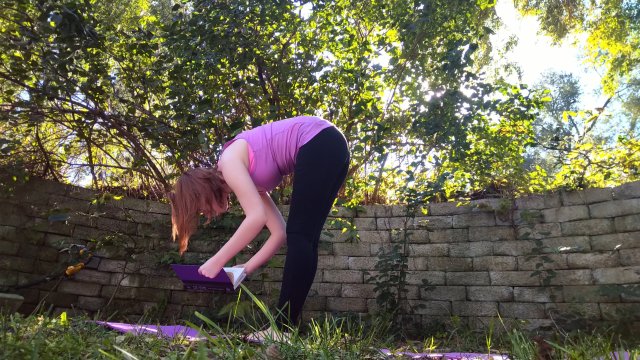
A regular standing forward fold, also sometimes just called forward fold, is done standing on your feet while you bend your upper body over. Your legs can either be flush together or hip-width apart, but I like to stand with my feet hip-width apart because it’s harder to keep your balance with them together. You can also feel free to bend your knees if you’d like to feel the stretch more in your back rather than your legs.
9. Standing Wide-Legged Forward Fold
This one is just like your seated wide-legged forward fold, except now it’s… well, standing!
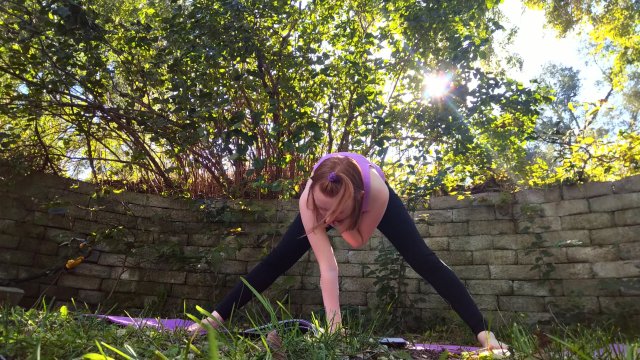
I prefer standing wide-legged forward folds to seated ones because you have a lot more wiggle room in how far apart your feet are placed. And, contrary to how a seated wide-legged forward fold works, in this pose, the farther apart you place your feet, the easier it will be to fold your upper body forward. Who knew?
To do this particular pose, stand first with your legs apart, any distance beyond hip-width. Then, slowly fold your upper body over as far as you’d like. I prefer going just as far as I need to get my hands down to the floor, where my book is, but you can certainly stretch farther, though I think it would be hard to read if you got your head all the way to the ground! You can also stay completely standing, which is a good idea to try if you want to strengthen your balance with your hands off of the ground.
10. Warrior 2 Pose
Okay, this one is definitely not easy to hold while reading, but I wanted to show you guys, anyway, because it does, you know, free up your hands for a book!

You can get into the warrior poses in a couple of different ways, but the main point of it is to get your feet about shoulder-width apart or more, and then you want to bend your front knee, pointing your front toes forward, and keeping your back toes pointing to the side. Traditionally, you extend your arms straight out from your shoulders in warrior 2, but I like to keep one hand on my hip and the other free for my reading when I want to devour some words in the pose.
And, in this pose, the farther apart you place your feet, the harder it will be to keep you strength and balance, so feel free to move your feet around as you need.
As with all yoga poses, it matters how you move in and out of them. So, take your time, don’t push yourself, and, most importantly, have a laugh or a give a smile along the way!
Now, I suppose I should add a quick disclaimer and say that I am not a licensed yoga teacher, nor am I a health expert, so you should make sure you are safe to do any yoga poses before you try them. It’s also extremely important that you listen to your body while doing any yoga or other exercise/stretch routine and pay attention to any discomfort you ever feel. If it hurts, back up or give yourself a break.
But, I do hope that, if you’d like, you’ll try out these easy yoga poses during your next reading session! I think it will be even better to reference back to this post in the upcoming winter months… as the cold always shuts us in and makes us spend more time sitting than stretching, which honestly sucks.
Now, go get stretching, and let me know what you think/thought of my reading tips!
–Kari

Pingback: How to Read and Do Yoga… at the SAME TIME. – Kari Lynn M.